
AndyCAD Tutorials
Four projects that show what AndyCAD can do, from a furnished house plan to a social media post. Every picture on this page is a real AndyCAD screenshot of the project at that stage. For more on any tool, follow the links to the user guide.
Before you start
- Open AndyCAD and sign in with your AndyCAD account if it asks.
- Each tutorial starts from a new drawing: File > New.
- Ctrl+Z undoes a step and Ctrl+Y redoes it. Ctrl+K finds any command by name.
- The command line at the bottom of the window takes exact coordinates. Points are written
<x,y>. Type a line and press Enter. - Each tutorial uses layers to keep its parts apart. Add one with + in the Layers section of Properties, double-click it to rename it, and click it to make it current. New objects go on the current layer.
1. A furnished house plan
A two-bedroom bungalow, 12 by 9 metres, with walls, doors, windows, coloured floors, furniture from the library, room names and two elevations, laid out on an A3 sheet. Work in millimetres: type 12000 for 12 metres.
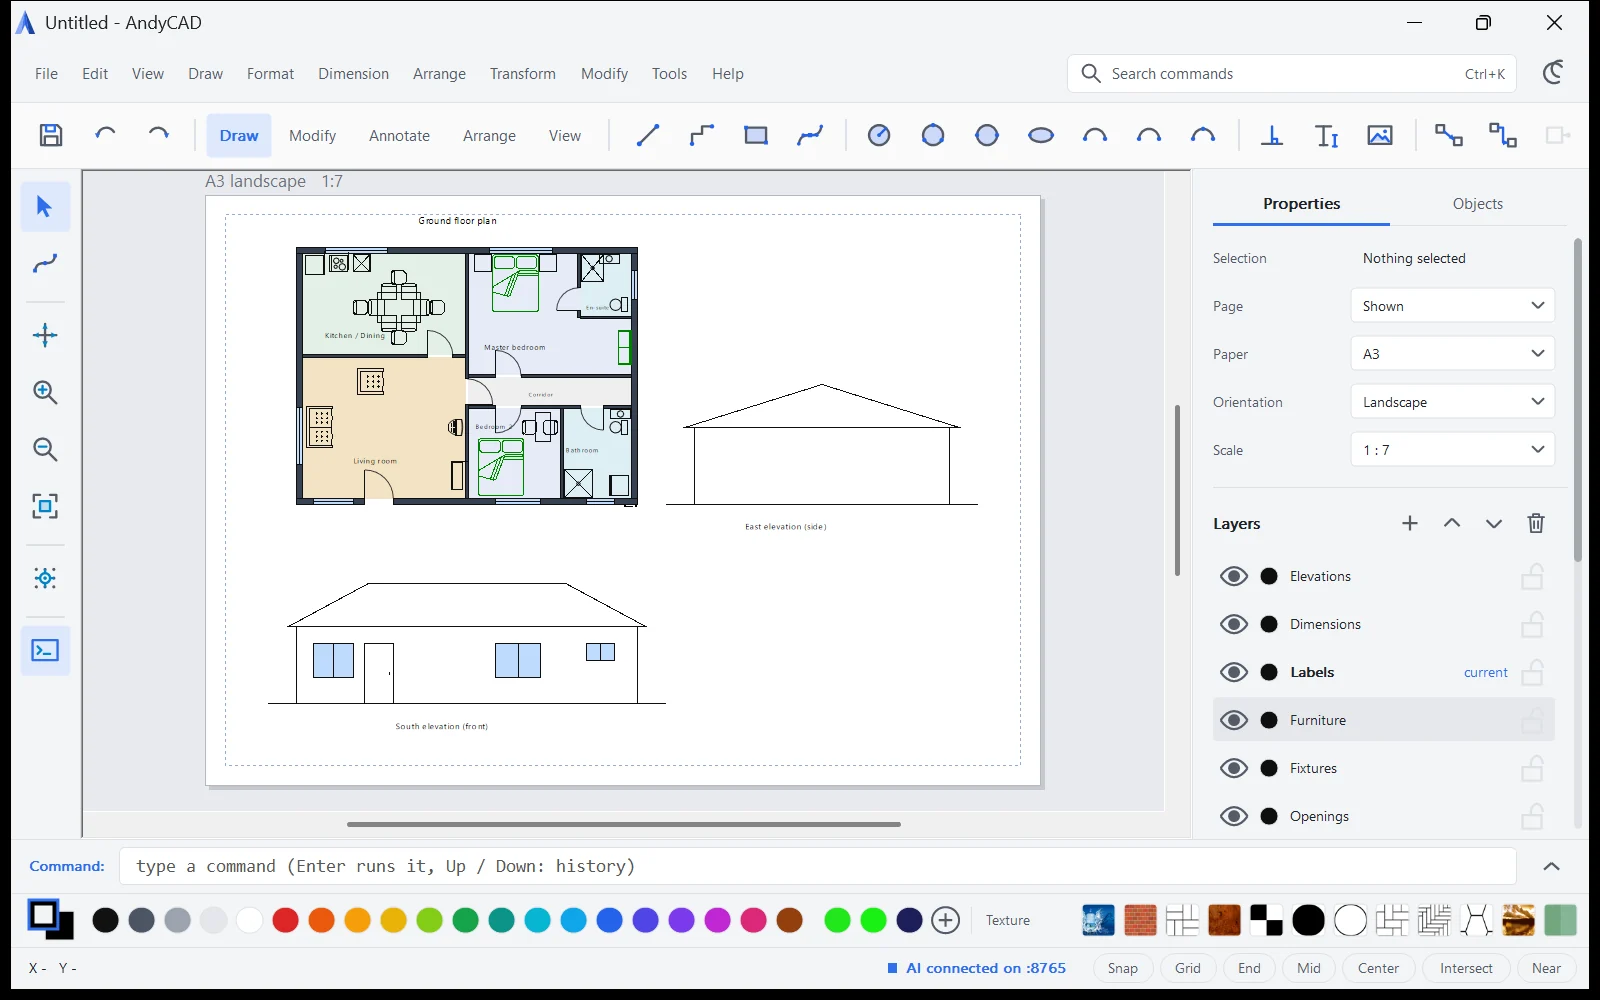
Set up the layers
Add seven layers, from the back to the front: Floors, Walls, Openings, Fixtures, Furniture, Labels and Elevations. Putting the floors at the back means their colours never cover a wall or a bed.
Draw the walls
Make Walls the current layer. The outside walls are 200 mm thick, with a 1 metre gap for the front door. Type these in the command line, one per line:
rect <0,0> <2400,200>
rect <3400,0> <12000,200>
rect <0,8800> <12000,9000>
rect <0,200> <200,8800>
rect <11800,200> <12000,8800>
The inside walls are 100 mm thick, with gaps where the doors go:
rect <5950,200> <6050,3500>
rect <5950,4400> <6050,8800>
rect <200,5150> <4600,5250>
rect <5500,5150> <5950,5250>
rect <6050,4450> <7000,4550>
rect <7900,4450> <11800,4550>
rect <6050,3350> <7000,3450>
rect <7900,3350> <10000,3450>
rect <10800,3350> <11800,3450>
rect <9300,200> <9400,3350>
rect <9900,6550> <10000,6800>
rect <9900,7600> <10000,8800>
rect <10000,6500> <11800,6600>
Press Ctrl+A to select them all. Then click the back square at the left of the colour band (the fill) and a dark grey chip. Click an empty spot to deselect.
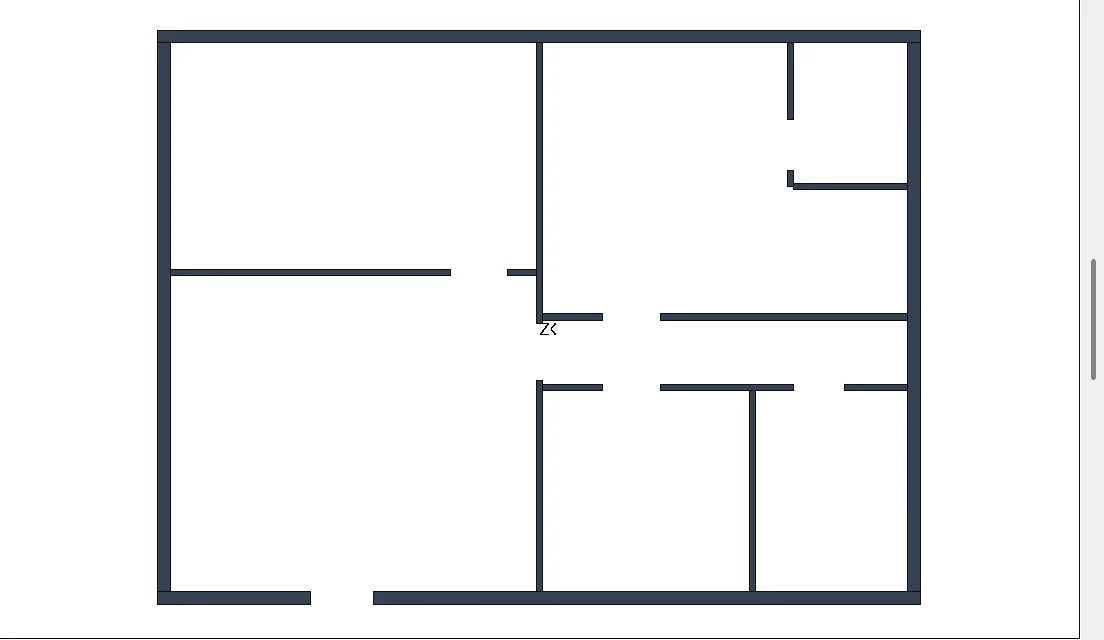
Doors and windows
Make Openings current. Each door is a leaf and a swing: a line for the open door, and an arc around the hinge. For the front door, with its hinge at <2400,200>:
line <2400,200> <2400,1200>
arc <2400,200> <3400,200> 90
The arc turns 90 degrees anticlockwise around the hinge, starting at the other side of the opening. Draw the other doors the same way, choosing the hinge side and the direction each one opens.
Each window is a thin rectangle in the wall with a line along its middle. Fill it with light blue (#BFDBFE) from the colour picker. For the living room's south window:
rect <600,0> <2000,200>
line <600,100> <2000,100>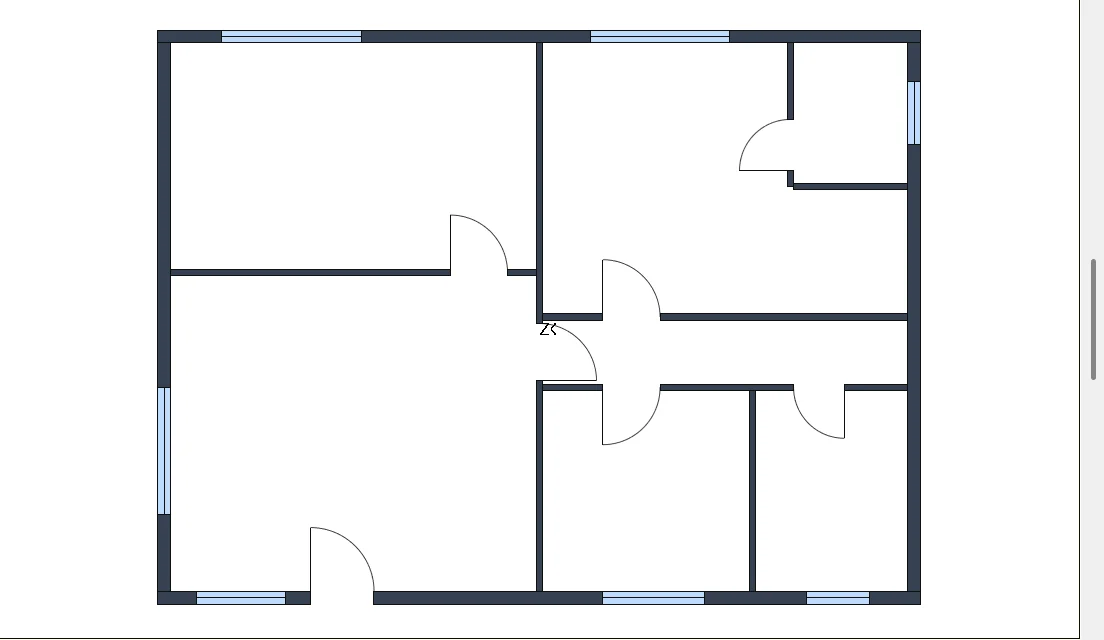
Floors, fixtures and furniture
- Make Floors current. Draw a rectangle over each room's floor with the Rectangle tool (or
rectin the command line), and give it a soft fill: warm beige for the living room, pale green for the kitchen, pale blue for the bedrooms and bathrooms, and light grey for the corridor. Set the outline to the same colour, so that only the fill shows. - Make Fixtures current and draw the bathroom fittings from simple shapes. A toilet is a small rectangle with a circle in front of it. A shower tray is a square with its two diagonals and a small circle for the drain.
- Make Furniture current. In the side panel, open the Library under Layers and choose furniture. Drag a sofa, a lounge chair, a bookcase, a dining table, chairs, beds, night stands, a dresser and a desk onto the plan. Choose appliances for the fridge, cooker, dishwasher, washing machine and television.
- Drag each block into place. Use Rotate on the Modify tab, or type
rotate 90in the command line, to turn one. - Make Labels current and use the Text tool to name each room. Click outside a text to keep it.
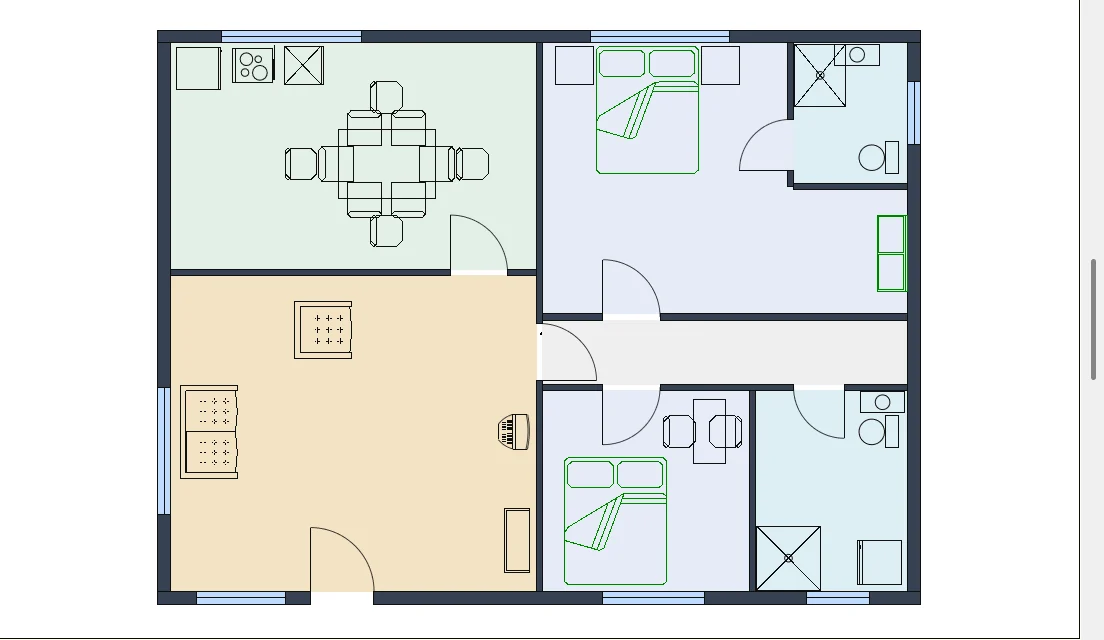
To check a layer on its own, hide the others with their eye in the Layers list. Lock a finished layer with its padlock so that you can't move it by mistake.
Elevations
Make Elevations current and draw the house as seen from the south, below the plan: the ground line, the wall outline (2700 high), the hipped roof, the front door and the windows. Then draw the east side to the right of the plan.
line <-1000,-7000> <13000,-7000>
rect <0,-7000> <12000,-4300>
line <-300,-4300> <2500,-2800> <9500,-2800> <12300,-4300> <-300,-4300>
rect <2400,-7000> <3400,-4900>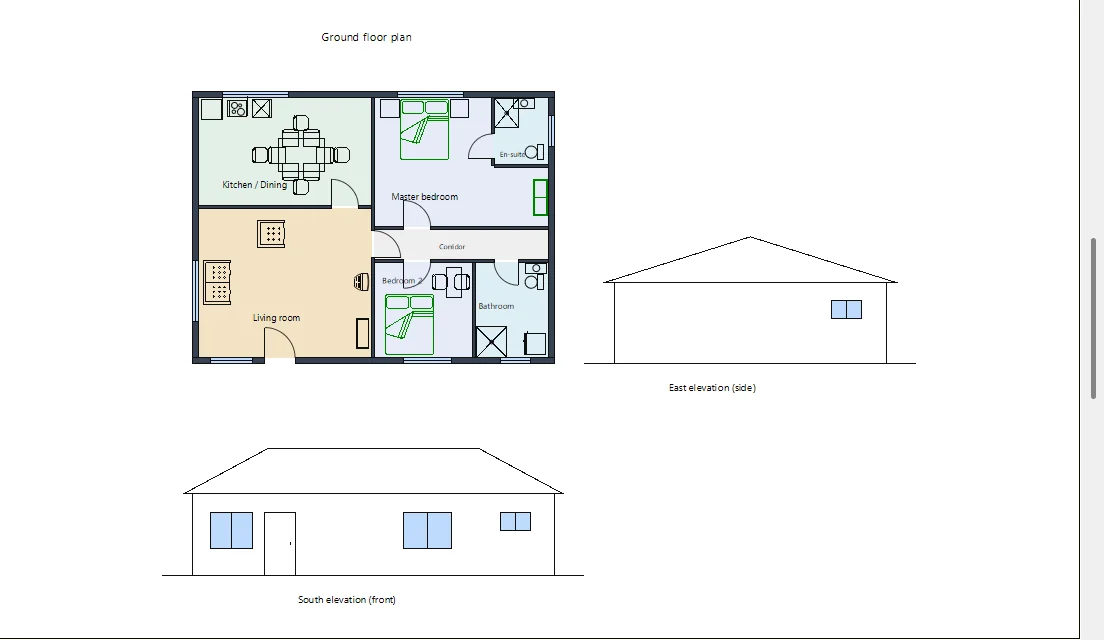
Lay it out on a sheet
- Click an empty spot so that nothing is selected. In Properties, set Page to Shown, Paper to A3 and Orientation to Landscape.
- Choose a Scale so that the drawing fits inside the dotted margins. Zoom to fit frames the sheet.
- If the drawing sits off-centre, press Ctrl+A and type
move <dx,dy>to slide everything onto the sheet. - Add a title with the Text tool, such as "Ground floor plan".
- File > Save As and choose PDF. The PDF holds exactly what is inside the sheet's margins, ready to print or send.
2. A social media post
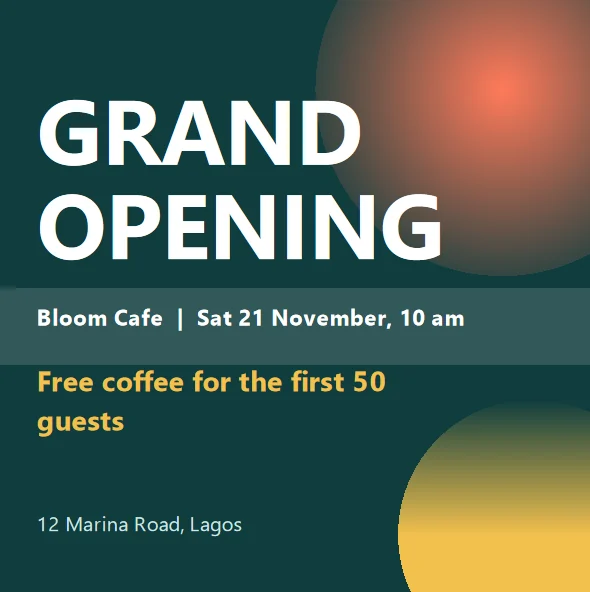
A square Instagram post for a café opening, with glowing shapes, a see-through band and bold type. You'll use page presets, layers, clipping, transparency fades and text styles, then export a PNG at the exact size Instagram wants.
Choose the page
- Click an empty spot so that nothing is selected.
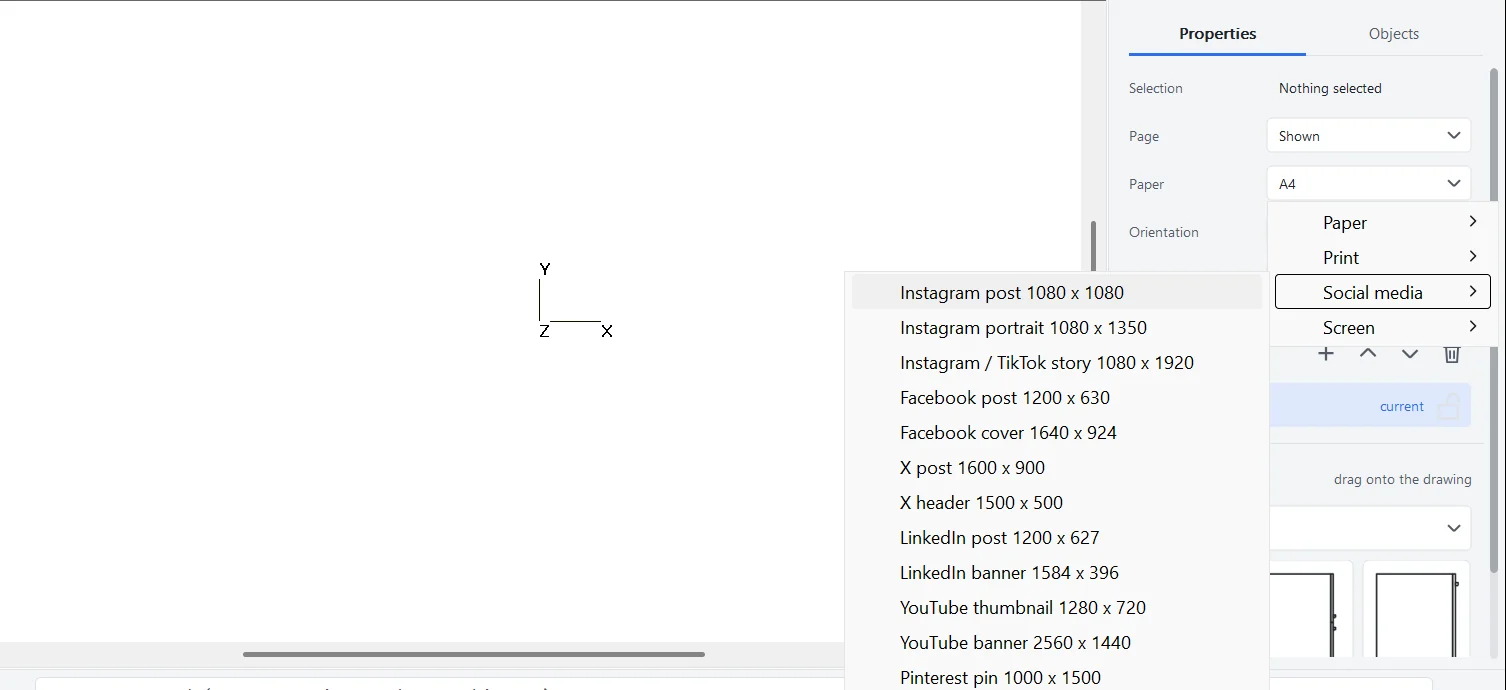
- In Properties, open Paper, then Social media, and choose Instagram post 1080 x 1080. The page becomes a square with no margins.
- Add three layers: Background, Shapes and Text.
The background
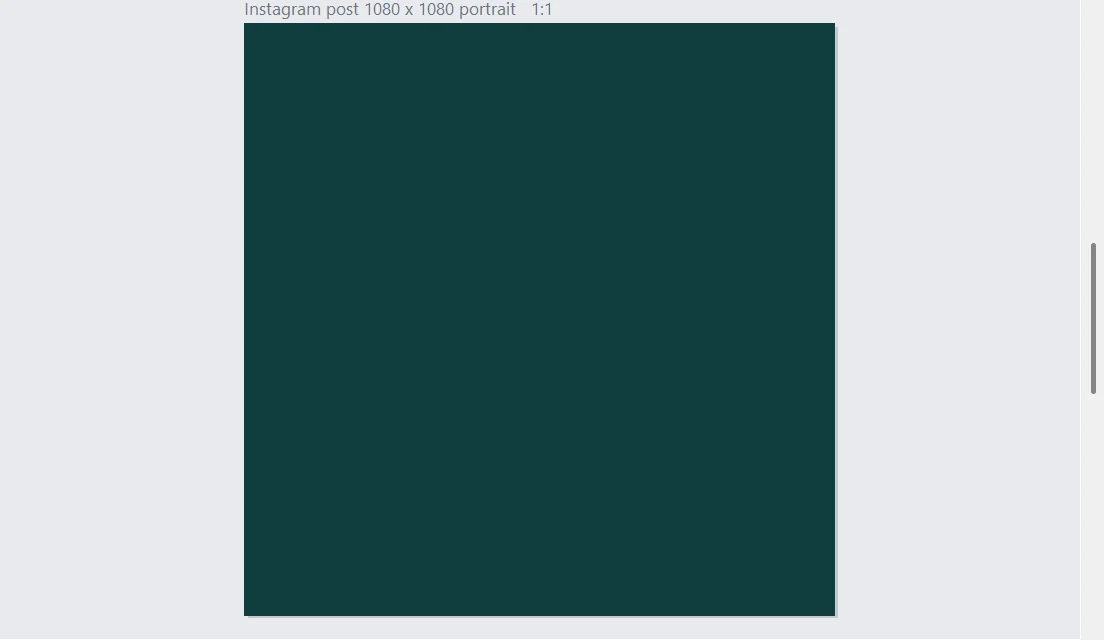
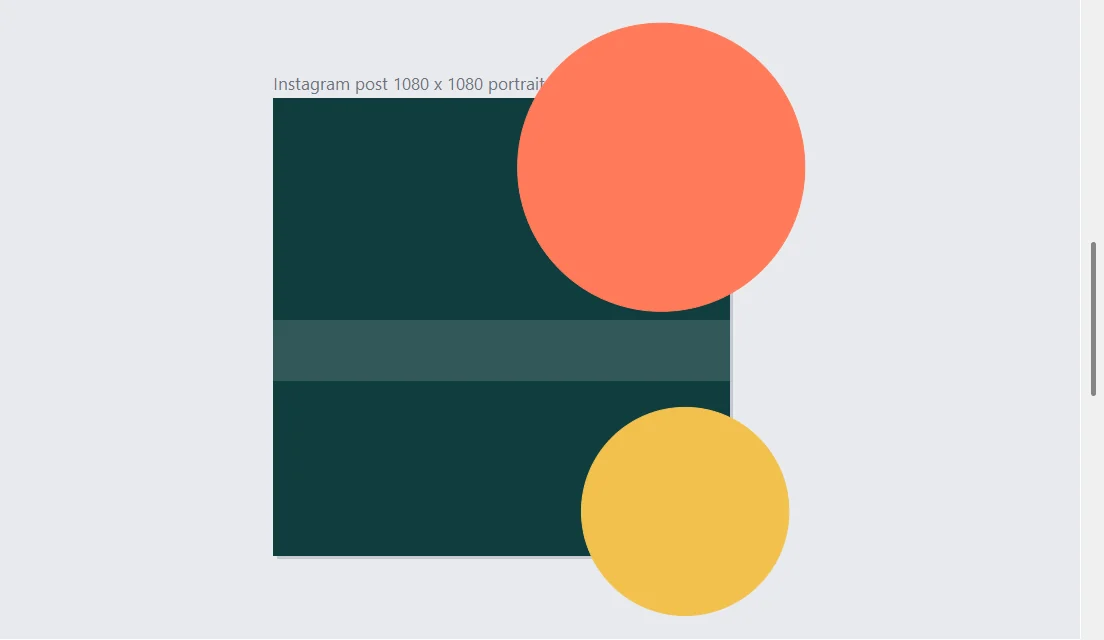
Make Background current. Draw a rectangle over the whole page with the Rectangle tool, from one corner of the sheet to the opposite corner. Fill it with deep teal: click + on the colour band to open the colour picker and type #0F3D3E in Hex.
Shapes
- Make Shapes current. Draw a large circle at the top right, overlapping the edge of the page, and fill it coral (
#FF7A59). - Draw a smaller circle at the bottom right and fill it gold (
#F2C14E). - Draw a wide, thin rectangle across the middle of the page, fill it white, and set its Opacity % to 14 in Properties. It becomes a soft band behind the date.
Text
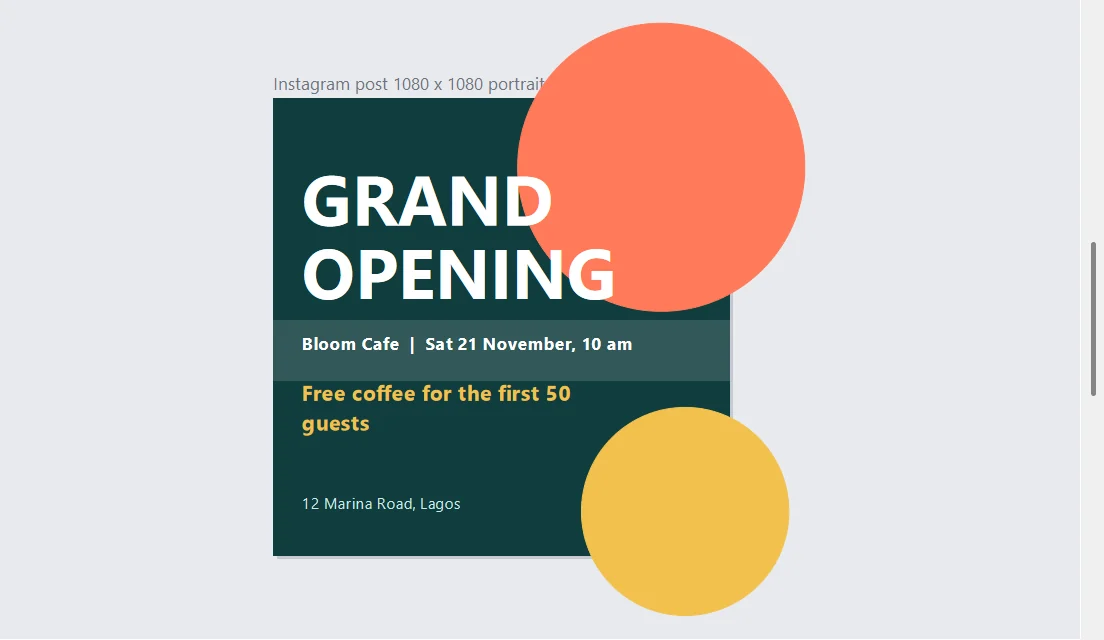
Make Text current. Use the Text tool for each line, and set its font, size and colour in Properties:
GRANDandOPENINGon two lines, very large, Bold, white.Bloom Cafe | Sat 21 November, 10 amacross the white band, bold, white.Free coffee for the first 50 guestsin gold, bold.12 Marina Road, Lagossmall, in pale teal.
Clip the circles to the page
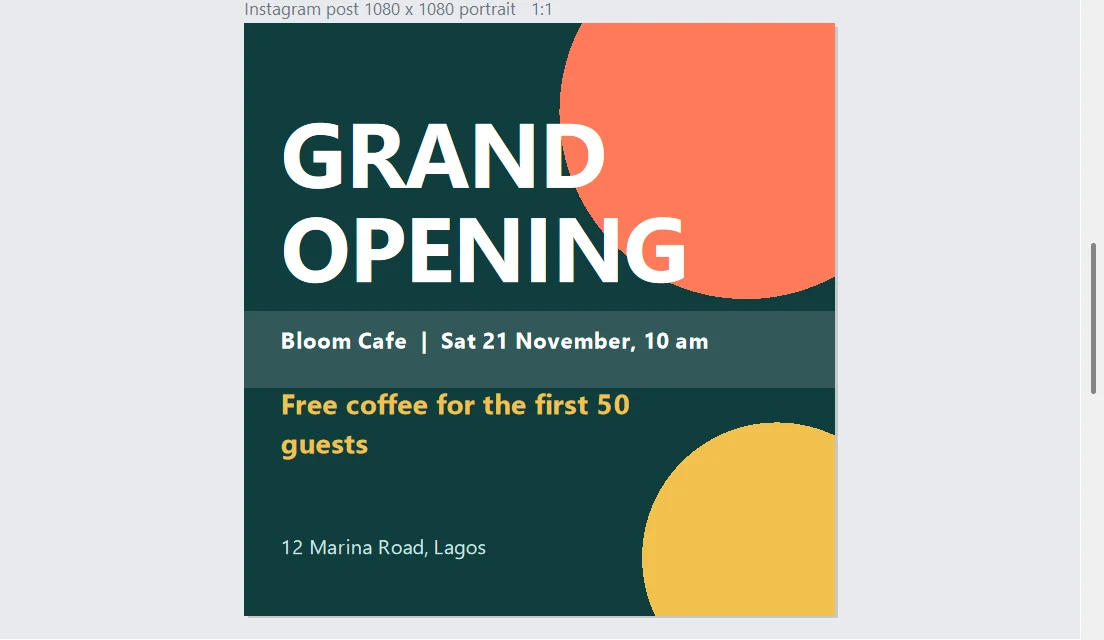
The circles hang over the edge of the post. Cut them to the page:
- Select the background rectangle.
- Choose Modify > Clip Shape, then click on the part of the coral circle that sticks out. The circle is trimmed to the background.
- Do the same for the gold circle.
Make them glow
- Select the coral circle and choose Radial transparency fade (Ctrl+K, type "radial"). Drag from the circle's centre towards its edge. It stays solid in the middle and fades into the background.
- Select the gold circle and choose Transparency fade. Drag upwards from its bottom edge. It fades out towards the top.
To start again, Remove transparency fade takes a fade off.
Export
Choose File > Save As and pick PNG. The file is exactly 1080 by 1080 pixels. Choose JPEG for a smaller file. Save the .aff too, so that you can change the date next time.
3. A process diagram
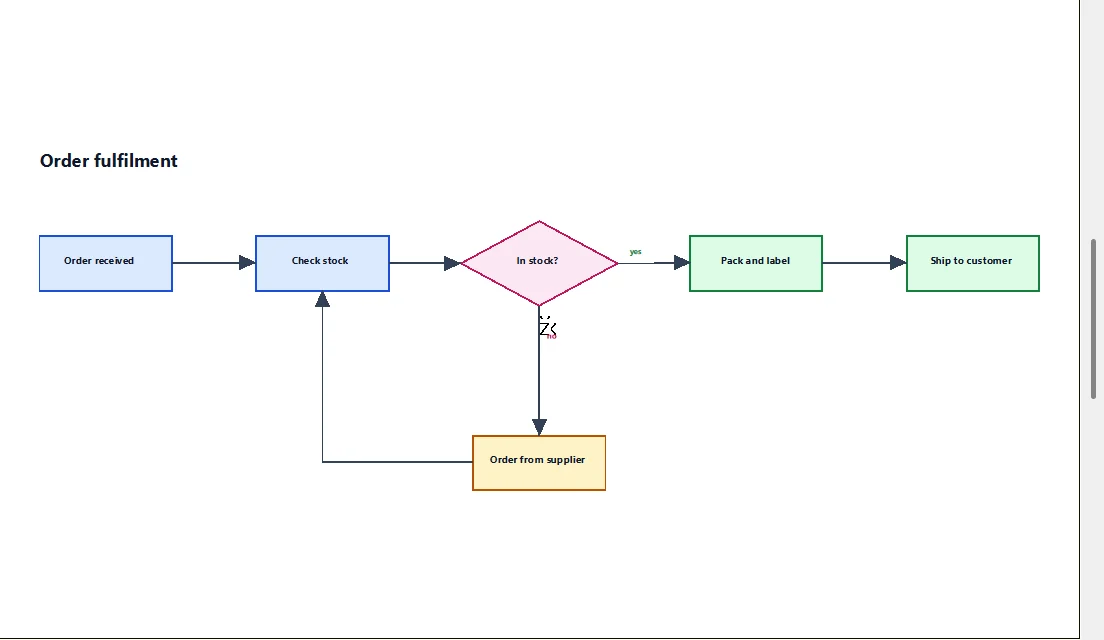
An order-fulfilment flowchart with colour-coded steps, a decision, and connectors that keep their arrows attached when you move the boxes.
Layers and boxes
- Add four layers: Steps, Decisions, Connectors and Notes.
- Make Steps current. Draw five rectangles of the same size with the Rectangle tool. To make the copies match, draw one, then use Copy and Paste, or a Rectangular array.
- Colour them by stage. Blue (fill
#DBEAFE, outline#1D4ED8) for receiving, green (#DCFCE7and#15803D) for dispatch, amber (#FEF3C7and#B45309) for the supplier. Set Line width to 3 for a crisp outline. - With the Text tool, write each step's name in its box: set Align to center and Style to Bold.
- Make Decisions current and draw the diamond as a closed polyline in the command line, then fill it pink:
line <0,2200> <1300,1500> <0,800> <-1300,1500> <0,2200>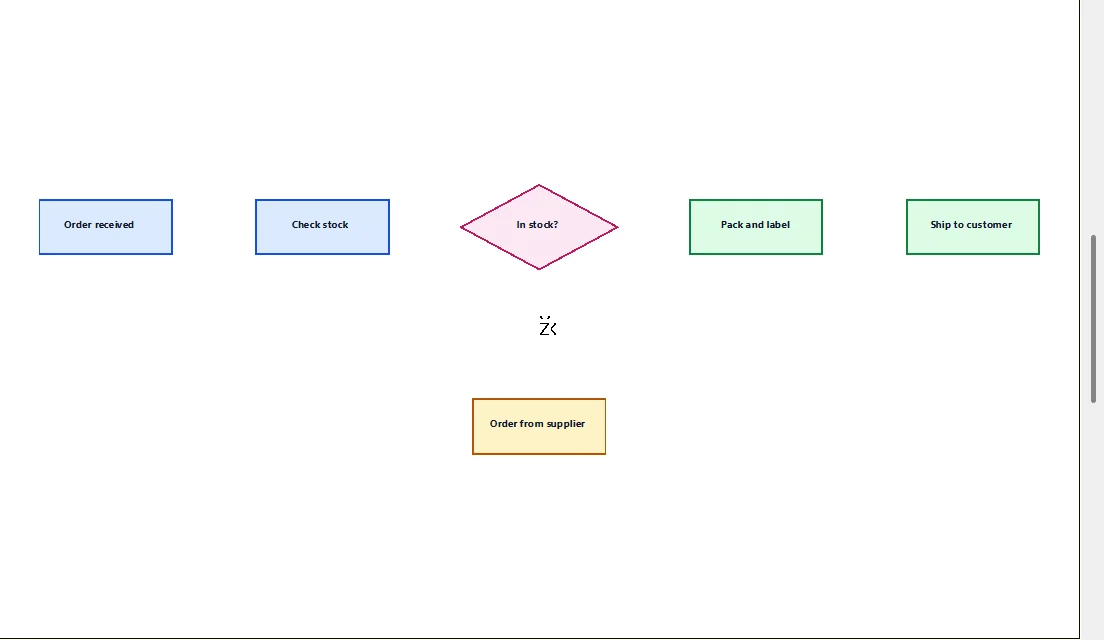
Connect them
- Make Connectors current and choose Elbow connector on the Draw tab.
- Click on the right side of Order received, then on the left side of Check stock. A connector joins them.
- Join the rest the same way: Check stock to the diamond, the diamond to Pack and label, Pack and label to Ship to customer, and the diamond's bottom point to Order from supplier. Join Order from supplier back up to Check stock.
- Select each connector and set its End to Arrow in Properties, its colour to slate grey and its Line width to 3.
- Make Notes current and add the labels
yesandnonext to the diamond, and a title.
Move a box, keep the links
Drag Order from supplier to the right. Its connectors follow it and turn at right angles round the boxes, so the diagram stays tidy as you rearrange it.
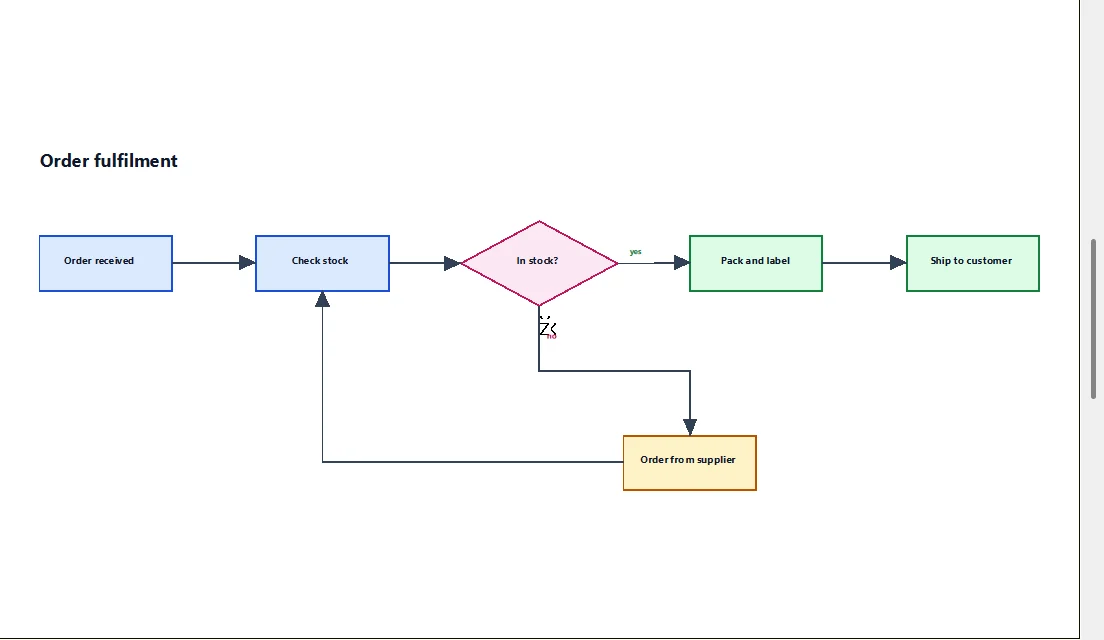
Click on a box's port to pin a connector there, or anywhere else on the box to let the end slide round its outline. See Connectors.
4. Let AndyAI draw it
AndyAI is the assistant built into AndyCAD. It draws with the same tools you used above, so everything it makes stays fully editable.
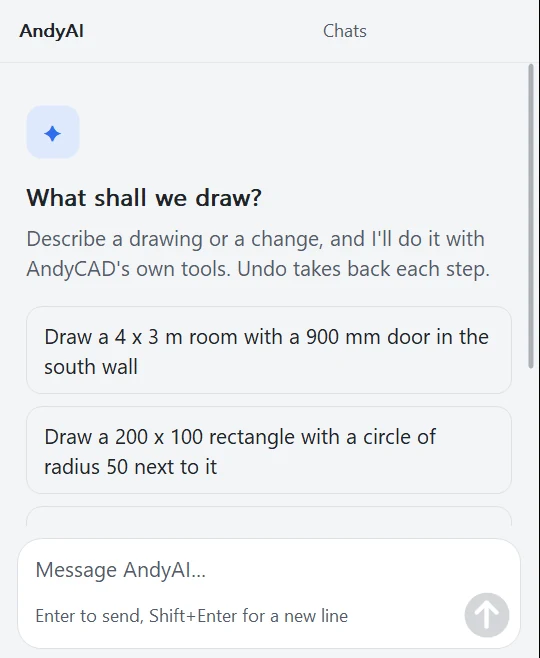
- Open View > AndyAI. Sign in with your AndyCAD account the first time.
- Describe what you want, as you would to a colleague. For example:
Draw a two-bedroom bungalow, 12 by 9 metres, with a living room, a kitchen, a bathroom and an en-suite. Put the walls, doors and furniture on separate layers. - Watch it work. It draws the walls, cuts the doors, places furniture from the library and names the rooms. Then it looks at a picture of the drawing to check the result.
- Carry on in your own words:
Make the living room floor warm beige,Add a window to the kitchen's north wall,Move the dining table 500 mm to the left. - Edit anything by hand as well. Every step it took can be undone with Ctrl+Z.
AndyAI comes with a monthly allowance; you can see what you've used, and top up, on your account page.
Where next
- The user guide covers every tool, menu and shortcut.
- Type
helpin the command line for the list of commands you can type. - Questions? Email [email protected].